Installation
To use the Valthrun Zenith Driver, users must create a bootable USB stick containing Zenith. Follow the steps below to install Zenith on your system:
This operation will erase all data stored on your USB stick.
Ensure that the USB stick is empty or you do not need the data any more!
Obtain the Zenith installer
In this step, we'll download the latest Zenith driver files from the official Valthrun homepage. The installer always contains all required files for a complete installation. You can install different versions of Zenith by using different versions of the Zenith installer.
- Visit the Downloads page.
- Download the latest
Zenith Driverpackage. - Extract the file including the installer from the downloaded ZIP file.
Install Valthrun Zenith
After downloading Zenith from the Valthrun homepage we will need to create a bootable USB flash drive. We'll use the Zenith installer to do this for us.
-
Run the installer as Administrator
Right click the Zenith Installer and run it as administator. -
Select
Create Zenith Boot Medium
When the installer is executed you are prompted with the operation you want to perform. Use the arrow keys to selectCreate Zenith Boot Mediumand pressEnter.
-
Select your TPM capabilities
Please indicate whether your system has a discrete TPM with power-cycle capabilities installed. A discrete TPM with power-cycle support provides full transparency and hardware-level consistency, significantly reducing detection risks compared to emulated TPM setups. For detailed information on how to obtain such a TPM chip, refer to buying a discrete TPM.
-
Select your target USB stick
Select the USB stick which you want to use to create the Zenith boot USB stick.
-
Confirm your selection
Verify and confirm that you have selected the right USB stick.
Typeyand hitEnterto confirm. Once confirmed all data on that USB stick is erased!
-
Wait until completion
The Zenith installer now creates a bootable USB stick with Zenith. Please wait and do not remove the USB stick untilZenith successfully installedis shown.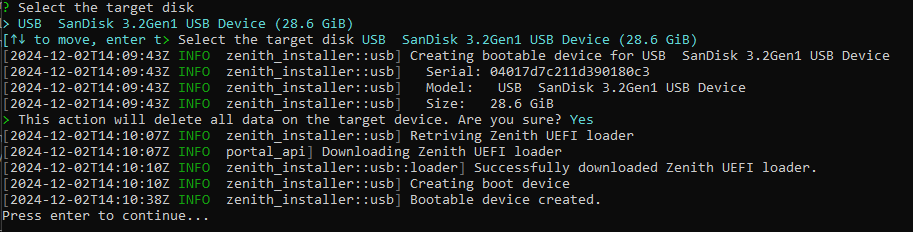
-
Success
Valthrun Zenith has been successfully installed. You can now restart the system and boot via the Zenith USB stick.
More details on how to boot with Zenith can be found here